Support Blendee.com Support Blendee.com

  • Manuals And Support
    • Getting Started
    • Manuals And Support
    • Templates
  • Video Tutorial
  • Faq
  • Blog
  • English
    • Italiano
Home / Basic Settings, Contents, Getting Started / Content Management

Content Management

217 views Less than a minute 0

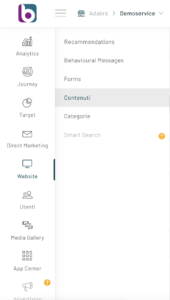
By selecting, from the side panel, the item “Website” and then later the item “Contents” you can access a series of features that will allow you to monitor the status of the elements imported into Blendee.

By selecting “Contents” you will be able to view the list of imported articles.

For each piece of content, it is possible to define the priority level to be assigned, by modifying the data within the relevant field on the priority column.

N.B.: Priority is a very important concept within the platform. This setting survives subsequent content imports and serves to tell Blendee’s central AI algorithm the highest priority in showing a given set of content.
This is very useful when, for example, you want to “push” a piece of content beyond its natural performance.

You can also filter your content using the search bar at the top.

Blendee Content Search

You can also view the details for each piece of content by clicking on the icon to the right of the content, in the “Actions” column.

On the content detail page, the main information, such as the text of the article, the image, the date of creation and the date of modification, as well as the associated tags, are summarized.

If you want to update the image of a piece of content, in correspondence with the content we are interested in, just click on “ Update Image “, a popup will appear that will communicate that the request has been taken care of.

From the Settings -> Advanced Settings menu, you can enter the path where the sitemap of the site is located, which is necessary for the automatic uploading of content to the platform.

Was this content useful?

Thanks for contributing!

Yes No
Content Basic SettingsContentsGetting Started

Related Articles

  • How to view your website when personalizing messages.
  • Login and Access to the Control Panel
  • How to show or hide the side menu
  • App Center

Search

Categories

  • 4A/B/XTesting
  • 5Account
  • 2AdServer: Reporting
  • 5AdServer: The Key Entities
  • 4Analytics
  • 3App Center
  • 2Audience Activation
  • 3Audience Platform Analytics
  • 10Audience Target
  • 5Audience Tracking Tag
  • 11Basic Settings
  • 7Buyer Personas
  • 11Campaigns Manager
  • 3Contents
  • 15Curated Audience
  • 10Dashboard
  • 1Direct Activation
  • 13E-mail Editor
  • 37E-mail Marketing
  • 9Experience Manager
  • 17Filters
  • 23Getting Started
  • 2Google AdWords
  • 3Media Gallery
  • 4Other Channels: Facebook Lead Ads
  • 2Other channels: Push Notifications
  • 3Other channels: Widget E-mail
  • 1Panel Research
  • 1Personalyzing your website
  • 14Segments
  • 1SMS Marketing
  • 24Template
  • 33Trigger
  • 1User Data Import
  • 27Users
  • 60video tutorial eng
  • 18Web Site: Behavioral Messages
  • 12Web Site: Forms
  • 13Web Site: Product Recommendations
  • 1Web Site: Smart Search

The most popular

  • Types of Product Recommendations – Glossary
  • Setting up filters
  • Introduction to behavioural messages
  • Configure a trigger
  • Introduction to Recommendations
© 2025 BLENDEE S.r.l. - Via Museo Biscari, 16 Catania (CT) 95131
Blendee Marketing Operating System | P. iva 06016140870
Privacy Policy - Cookies Policy