Among the various trigger actions, both real time and scheduled, that Blendee allows, in addition to email, SMS, Facebook campaign, web push notification and many others, the “addition or removal of a tag from a user” has also been introduced.
This feature is very powerful as it allows you to add or remove a user tag if it meets or no longer meets the criteria for which it was assigned that tag.
This way, the user’s profile will always be aligned.
To configure this action, follow the classic trigger configuration (to learn more about this topic, we recommend the article “Configure a trigger”).
Once you have finished configuring and saved the various settings you have configured, you should proceed to carry out the message or action that you want to implement for the specific trigger you have created.
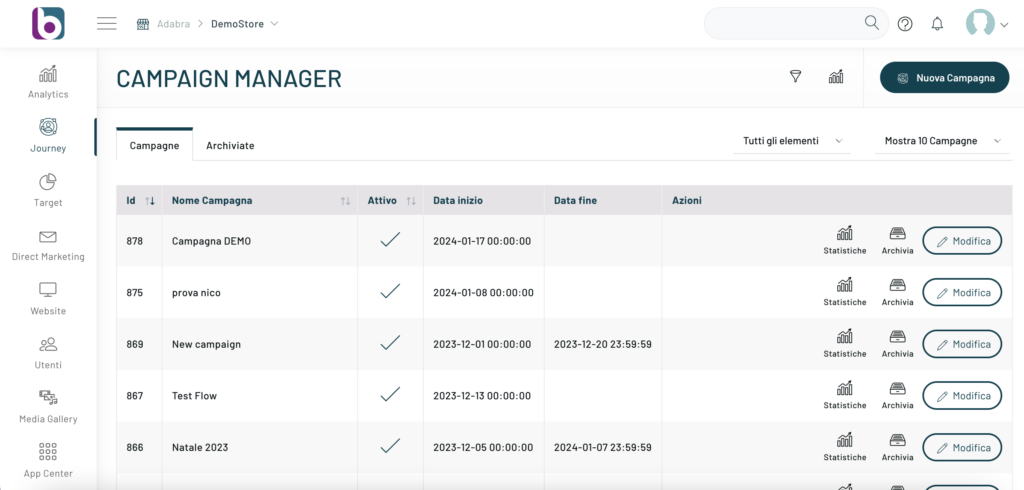
You can access the side menu, click on the “Journey“ item, then select “Campaign Manager” and then select the campaign on which you want to insert the trigger, clicking on “Edit”.
You can, at this stage, also choose to create a new campaign by clicking on “New Campaign.”
To proceed, once you have chosen to create or edit a campaign, click on the “Create New Experience” button at the top right.
After entering the name of the experience, select “All users of a trigger” from the User Base dropdown, then choose the previously created trigger and proceed by clicking the Confirm button.

Now, through the Experience Manager, select the Update Tag action from the left column and drag it to the workflow page, linking it to the starting user base. At this point, clicking on the element will open a right column where you can proceed with the Configuration.

This is where you will first be able to choose between the following actions:
- Add tags to the user
- Remove tags to user
Secondly, you will be able to insert the tags on which to act the action. You will need to type in the tag and click the Add button. You can insert multiple tags to act on. Then save the configuration.
Finally, press the “Save” button at the bottom right.
Thanks for contributing!