As soon as the Blendee installation is complete and the central system has collected and processed enough information, our team will provide you with the Blendee console login details.
To access the console, simply connect to the address: http://my.blendee.com and enter the credentials received.
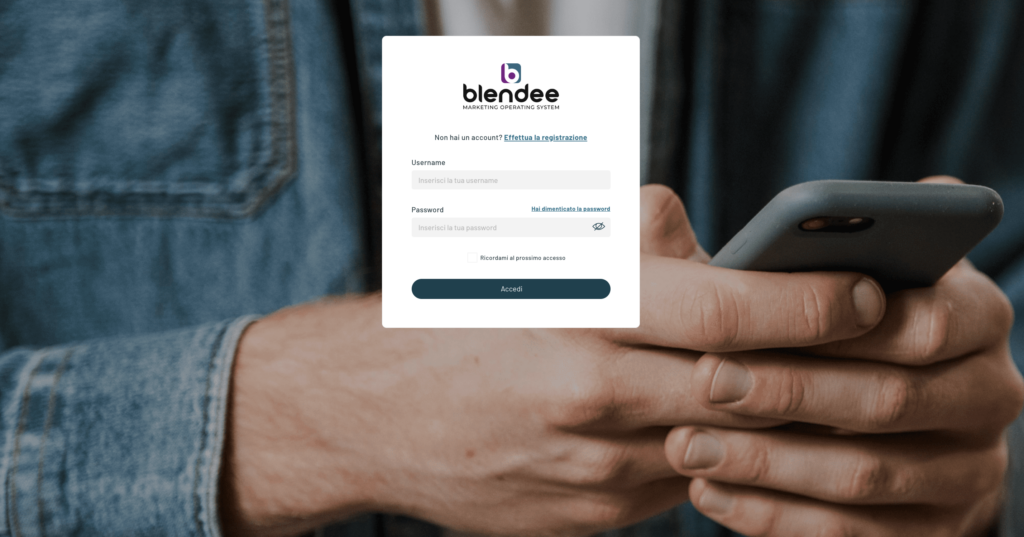
It is recommended that you save these credentials in a safe place.
The my.blendee console is (in desktop mode) characterized by the presence of a central data presentation area and some contextual and non-contextual menus.
*Insert correct printscreen of the statistics dashboard
Through the left-hand menu, you can access all the various active sections and modules. The various sections are divided into macro groups.
Dashboard, Campaign Manager, and Media Gallery

The first item “Dashboard” takes you back to the data presentation page.
Clicking on “Campaign Manager” will open a screen with all the campaigns configured so far, and it will also be possible to configure new campaigns. To learn more, we recommend “How to create a new campaign”.
By clicking on Media Gallery, a screen will open where you can manage images and files placed within the platform. We recommend that you learn more about this topic by reading the article “Create a new folder in Media Gallery”.
Other
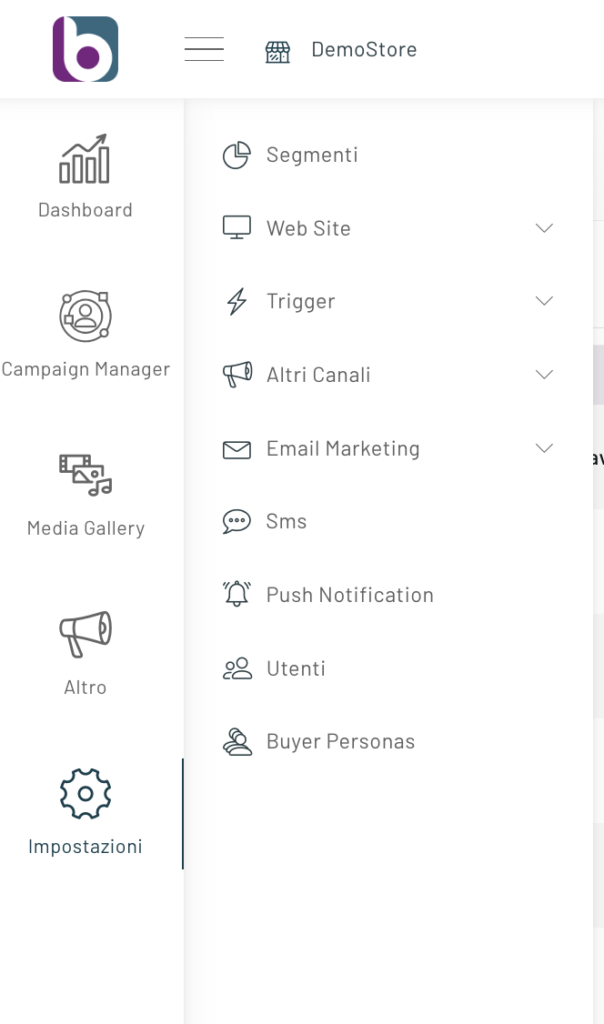
By clicking on “More”, you can access all the activities that can be configured on Blendee:
- Segments
- Web Site
- Trigger
- Other Channels
- Email Marketing
- Customer Service
- Users
- Buyer Personas
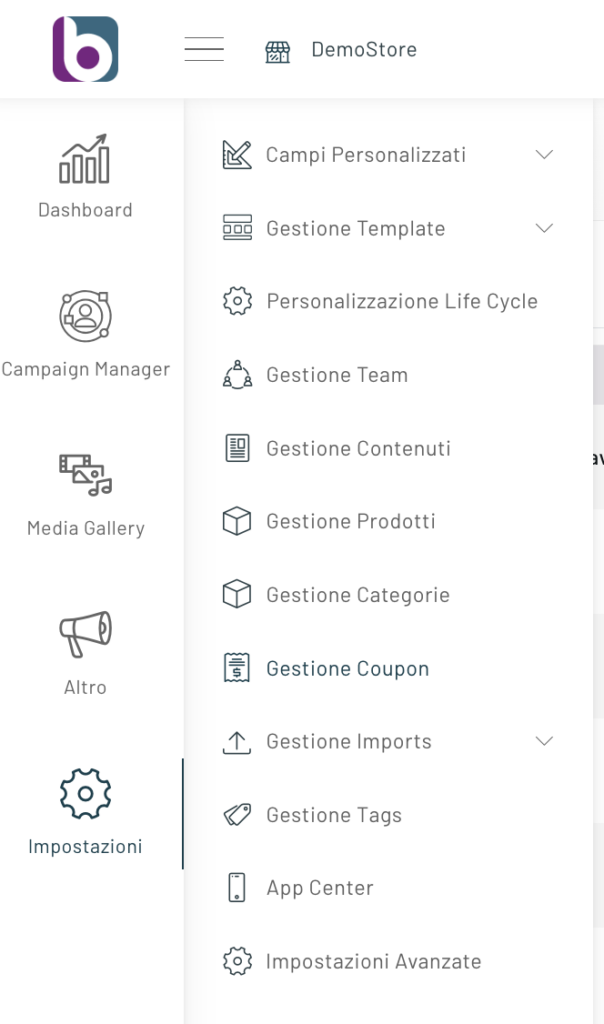
Settings
By clicking on “Settings”, you can access the Catalog Management, Product Management and Content Management, finally clicking on App Center you can access a page where you can manage apps such as Facebook, Google Ads, Zapier and other external applications.
Thanks for contributing!