The configuration of filters in the Blendee platform takes place entirely within the management and creation of segments, simplifying the creation of custom user bases.
Within the segment configuration screen, select the Add Filter button to access the filter configuration.
You can select from the following options:
- Library Filter: With this option, you can retrieve a filter that you previously created and want to reuse.
- New Filter: By selecting this option you will have the option to create a new filter according to your needs.
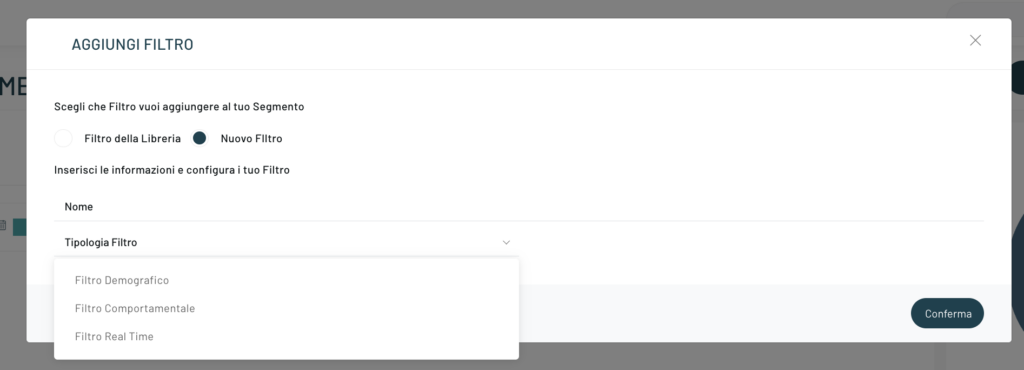
Selecting New Filter will open a section where you will find the macro categories of filters that you can configure:
- Demographics (learn more about Demographic Filters)
- Behavioral (learn more about Behavioral Filters)
- Real Time (to learn more about Real Time Filters)
If, on the other hand, we choose “Library filter” in the menu, among the types of filter, the item will also appear:
- Life Cycle (to learn more about Customer Life Cycle)
as well as the list of filters previously created by us.
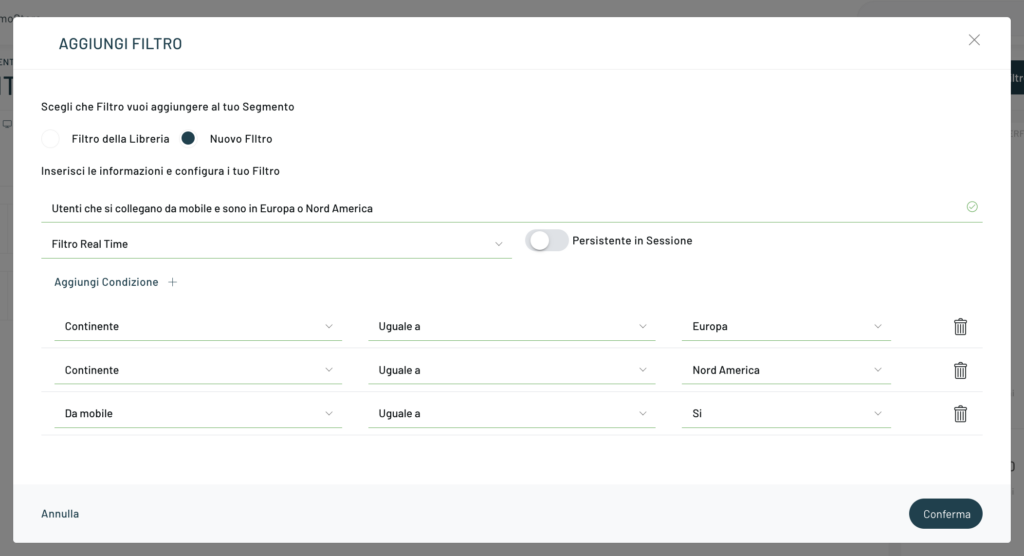
Subsequently, once we have clicked on “Confirm” we just have to select one of the macro categories that you are interested in configuring, set the condition by clicking on Add condition and finally click on Confirm or add other conditions.
Filter with multiple conditions
A filter can have multiple conditions within it, and they are linked through logical AND/OR operations.
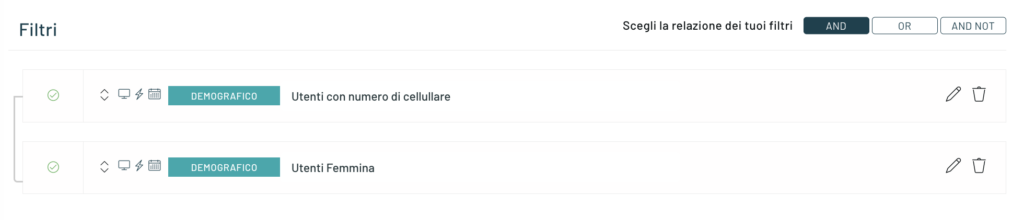
Behavioral filters with multiple equal conditions will work via AND logic (see image below)

Demographics filters with multiple equal conditions will work via OR logic (see image below).

Real Time filters with different conditions will work in AND, while with the same conditions in OR.
How do logical operators work?
Conditions in AND analyze conditions with this schema:
condizione1 & condizione2 = true/falseReturn true if all conditions are true
Conditions in OR analyze conditions with this scheme:
condizione1 | condizione2 | condizione3 = true/falseReturn true if at least one condition is true
Once created, the filter will be inserted into the segment configuration
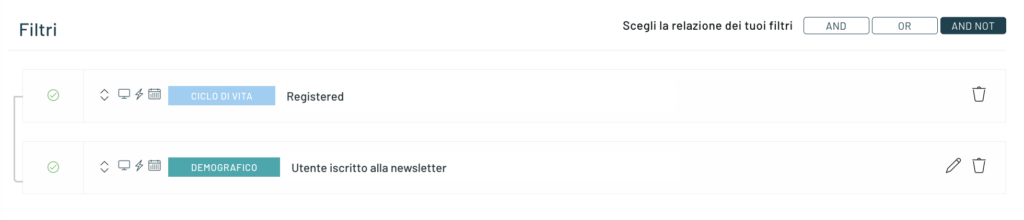
If you want to edit an existing filter, just click on the “Edit” icon ![]() which is located to the right of the filter.
which is located to the right of the filter.
N.B.: It is not possible to edit the Life Cycle filters, as you can see in the image below
At this point, a screen will open where you can change the values assigned to each filter being created.
It is very important that you define the parameters of each filter in the way that best suits your type of business and the objectives you intend to achieve.
Inside each filter container box, there are three indicative icons:

Indicates that the filter can be used on the web channel (e.g.: Behavioural messages, recommendations and forms.)

Indicates that the filter can be used in real-time triggers.

Indicates that the filter can be used in schedulable triggers (Ex: Scheduled Trigger, Mail, and Campaign Manager)
Suggestion:
If, over time, you want to change the parameters of each filter, you can still do so; However, we do not recommend doing this frequently as it will be difficult for you to make considerations with respect to the historical behavior of this segment.
Tips: If you haven’t already read it, we recommend reading the following article : Filters – glossary
Thanks for contributing!