As illustrated in the introductory chapter on triggers (for more information, please refer to the in-depth article ), Blendee allows you to manage a significant number of triggers for each catalog.
It is possible to manage and define triggers of the same type (e.g. the trigger for the recovery of the abandoned cart) for different segments so as to send a suitable communication to each specific type of user.
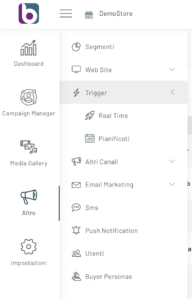
To create your own trigger, log in to the platform and on the menu on the left and select the item Journey –> Trigger.
You can choose between 2 types of triggers: real time and scheduled.
For example, by clicking on Triggers Real Time, you can see the complete list of all configured triggers (both active and not).

To configure a new trigger, click on the “New Trigger” button at the top. You will be able to select the type of trigger to activate.
Please note: To date, by applying the available models, it is possible to configure over 300 types of triggers.

The first step, therefore, is to select the type of trigger you want to configure. Let’s select, as an example, the “Welcome Message” trigger.
This action allows you to send a welcome message containing promotions to all those who register, in combination with the usual “Welcome Email” that starts as soon as the user registers.
This is the model followed by Amazon, for example: if the first communication (usually managed by the CMS) is limited to confirming the registration and, in the case of double opt-in, to requesting verification of the e-mail address provided by the visitor, the second can be used to send personalized offers.
Continuing with the configuration of the trigger, we can see how in the general configuration screen it is possible to enter some general rules.
Please note: at this stage we are only configuring the trigger action, for the channels on which to activate it it is appropriate to proceed to the next configuration steps.
In addition to entering the name, description and selecting the catalog, it is also possible to choose, at this stage, the segment that allows the trigger to be triggered only if the user belongs to it.
NB.: It should be noted that the segments are not calculated in real time but are scheduled over time
In addition to the basic configuration, there is also an “advanced configuration”, thanks to which you can condition trigger sends.
To learn more about this topic, we recommend that you read the following article “Conditioning trigger submissions”.

Other fields to configure based on the chosen trigger are:
CONFIGURE TRIGGER OPTIONS
Each trigger has its own specific settings. To find out how to configure each type, consult the specific articles.
CONFIGURE REAL-TIME CONDITIONS
Configure the conditions that will be checked along with the type of action you choose. Click on “Save”.
Once the first configuration step has been completed, from the side menu it is advisable to select “Campaign Manager” and click on the “Edit” button, corresponding to the campaign on which we want to apply the triggers.

At this point, to complete the configuration, it is advisable to click on the button at the top right “Create New Experience”.

After naming the experience, select “All users of a trigger” from the drop-down menu in the User Base, choose from those created by us and click on the Confirm button.

This will open the experience customization page and here you will be able to select the channel for our trigger from the left column and complete its configuration. The channels to be used can be:
- Web personalization (product and content recommendations, behavioural message)
- SMS
- Web Push Notification
- Webhooks
At this point we have configured a Trigger.
Thanks for contributing!