To access the section dedicated to Behavioural Messages, from the main menu select “Website”, then select “Behavioural Messages”.
Behavioural Messages allow you to personalise parts of web pages dynamically, choosing the content to replace or add. They can contain text, links, coupons, forms and recommendations within them.
On the dedicated page it is possible to view the available templates already prepared for behavioral messages. But you are offered the option to create custom blocks to your liking and choose the location where you want to add or replace the block.

The models that are proposed by default are characterized by particular behaviors and logics and each represent a different way of interacting with the user. We recommend the use of templates whose name is preceded by the word NEXT as they are the most recent, most compatible, responsive and customizable.
To create a new block, click on the “New Behavioural Message” button and follow the wizard procedure. After following the first steps, you will be able to choose the template.
You can refer to the Templates page of this guide to get an overview of the available templates and their features.
Configuration
To create a behavioural message, you can proceed either by accessing the dedicated section of the Campaign Manager, or by clicking on the side menu on the item “Website” and selecting “Behavioural Message”.
In both cases you can access the editor that allows you to create your own behavioral message in a few simple steps using a wizard.
As a first step, you should proceed with the basic settings, as shown in the following image:

In a first step, it is possible to configure the name of the message and specify any content to be inserted, such as a form or a coupon code previously created.
Next, the wizard prompts you to specify the user base , if any, or user segment to show the message to.
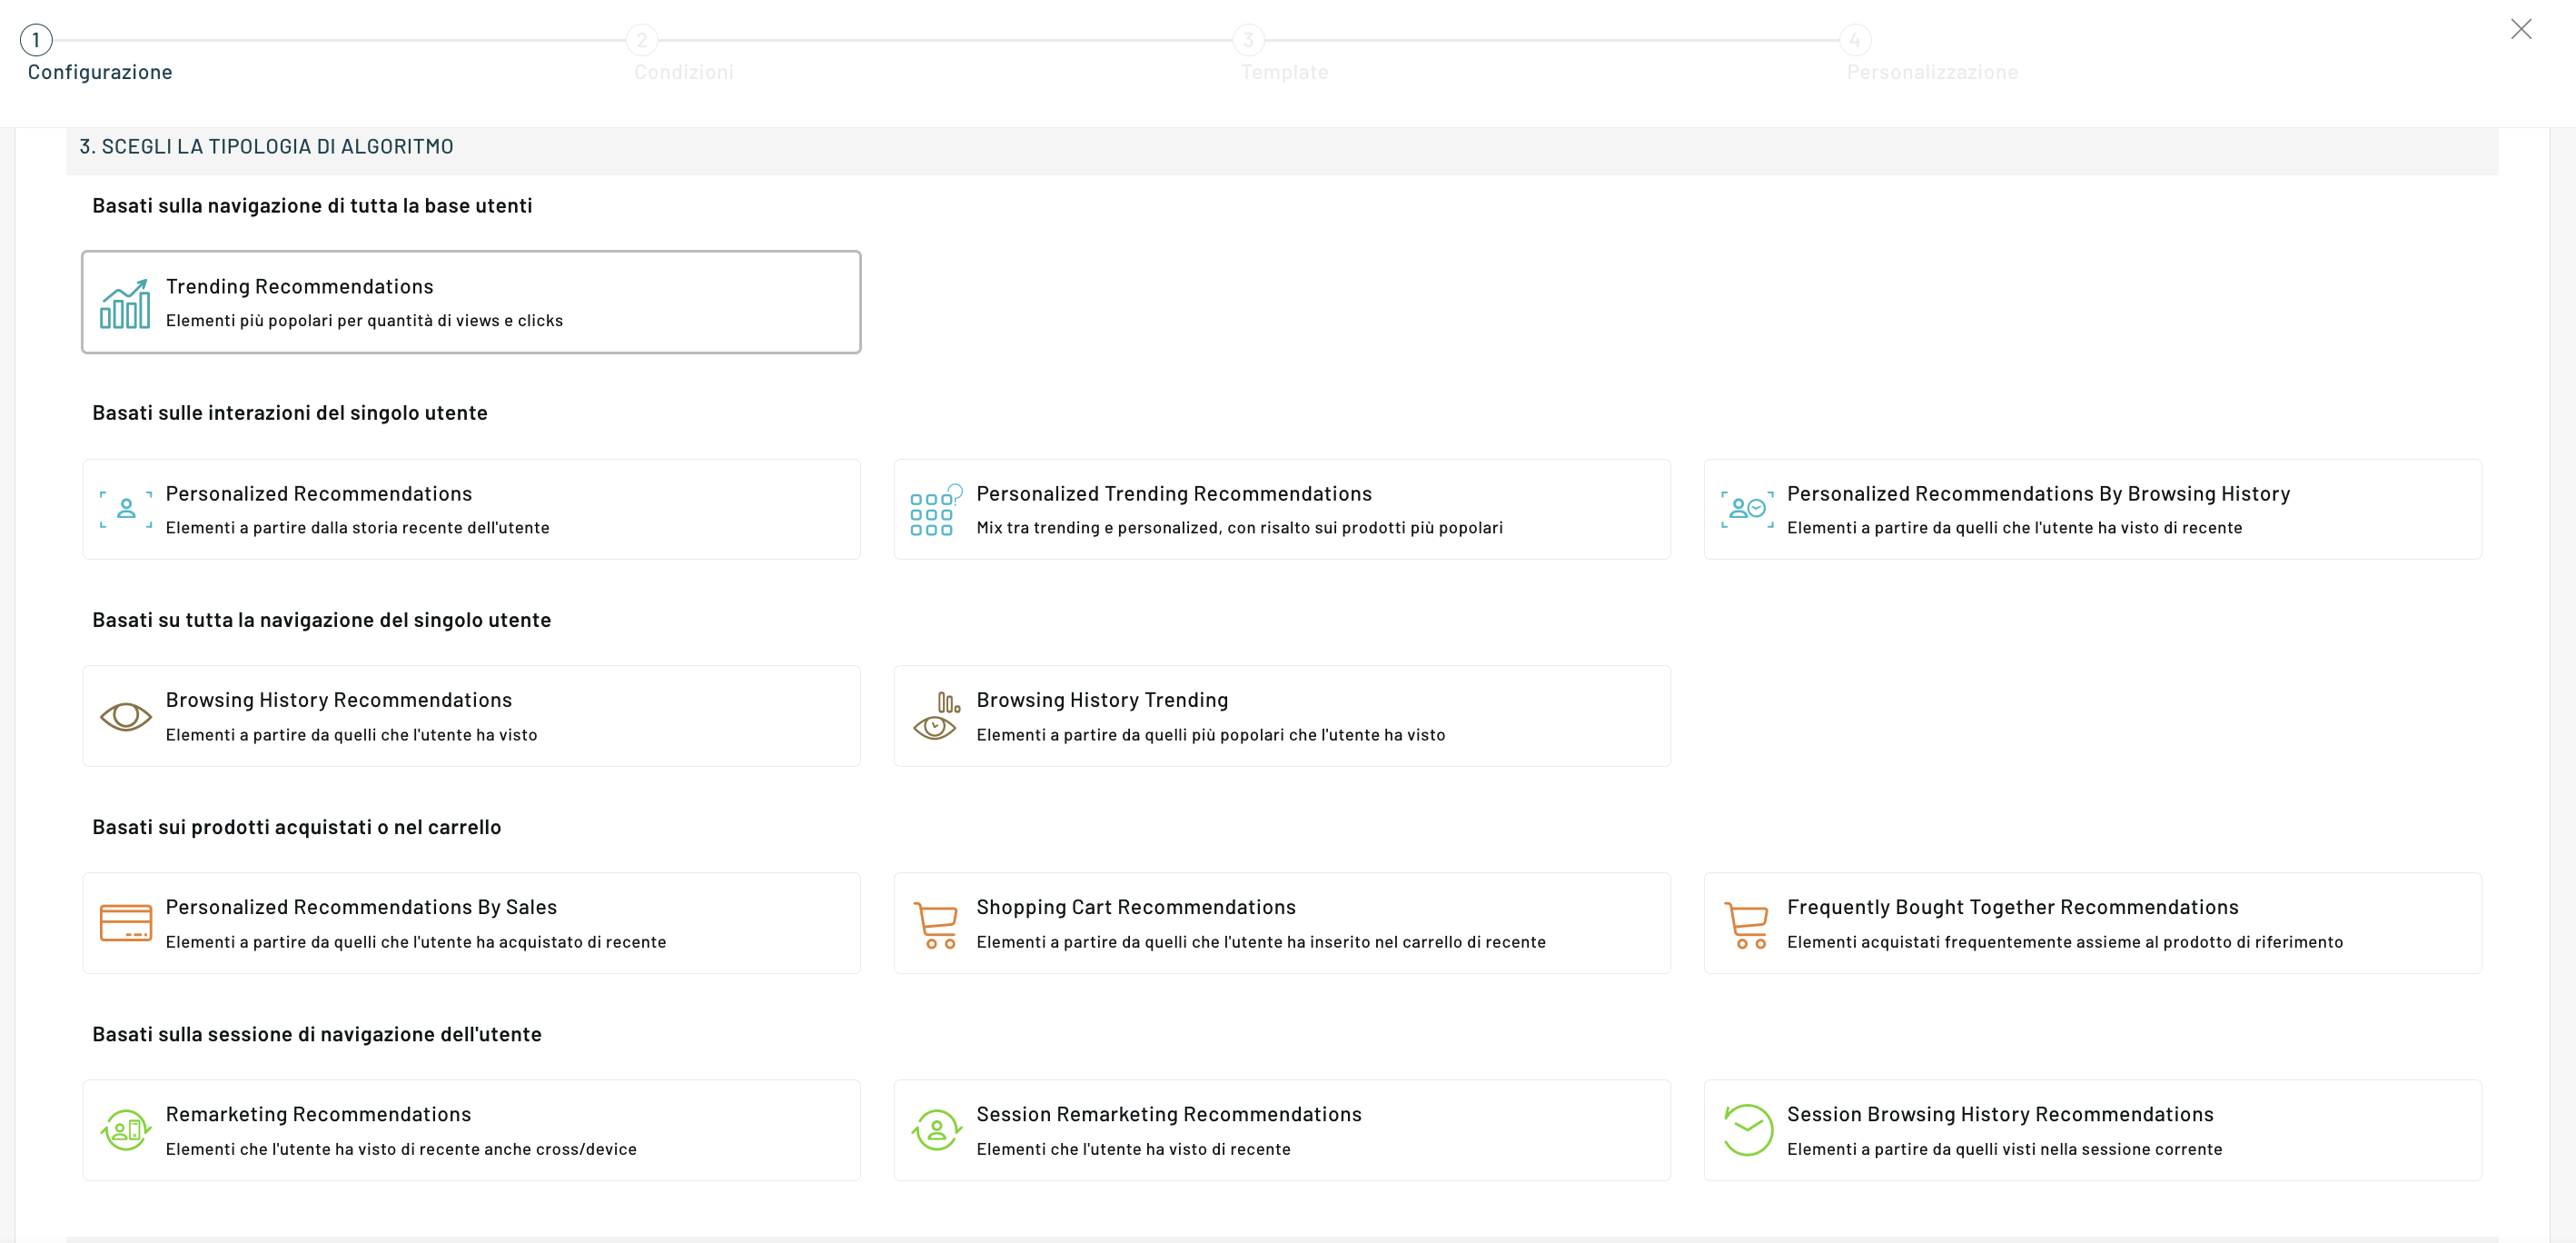
In case a type of product is selected to be included, the list of algorithms will also be displayed from which we should choose the one to be used to show the products/content within the recommendations.
Once you have completed the required fields, you can proceed to the next step by clicking on the “Next” button at the bottom.
Conditions

At this stage, the wizard allows you to enter the conditions related to the display of the message. You can, in fact, choose on which specific section of the site to show it (e.g.: Home Page, Category Page..). It is possible to select more than one type of page, making sure that in each one there is the XPATH of the element in which the message will be placed, otherwise it will not be displayed.
In the event that we have selected the Products as the type of content to be included on the previous page, the conditions for recommendations will also be displayed in this step.

It is also useful to remember that it is necessary to respect the constraints established by the algorithms for recommendations if their inclusion has been selected (for example: the Frequently Bought Together algorithm is only functional on the Product Detail Page).
This advice also applies to the conditions that we are going to insert in the event that there are product recommendations
Once the page has been selected, simply click on the button on the side “Add Page Type” and click on the “Next” button at the bottom, to access the next step.
Templates
As shown in the image above, in step 3 of the wizard you can choose the template from the different templates proposed and described above. Once you have selected the graphic template, it will be recognizable by a colored triangle at the top right of the respective box.
By going to “Settings” – “Template Management” – “Behavioural Message” you can create your own custom templates starting from the cloning of existing templates. These templates will be visible in the “Personal” tab.
Personalization
Once you have selected the template to use, you can move on to the next step dedicated to customizing the content.
Here it is possible to set the contents and graphic layout of the message and preview it using the side menu made available to modify the parameters without necessarily going to act on the CSS.
To proceed with the preview, simply click on the arrow next to the bar with the url of your website, if it has been previously configured by following the procedure indicated in the dedicated article.
To proceed with the preview, it is necessary, if required by the chosen template, to position the content within the page as shown below.

It is possible to proceed either with the automatic selection tool or in manual mode. In the first case, when you hover over the various elements of the page displayed below, the selected HTML container will be highlighted by clicking on the element.
In case you choose the manual configuration , you will need to enter the path by hand (XPATH) or the id of the container you intend to use.
The behavioural message can be placed above, below or instead of the selected container.

Once you have selected the position on the left column, you will be able to configure various features of the template, including some recurring ones such as:
– “Message text” function that allows you to insert textual content through a simple and intuitive editor and allows its graphic customization;
– “Border and Background” feature that allows you to customize the layout of the message by defining the color of the borders and the background of the box;
– “Position & Dimensions” feature that helps to define the position and dimensions of the box and other features.
These are just some of the menus that will be available in the side box and will vary depending on the template chosen. For a more detailed guide to templates, please refer to the dedicated section.
To preview the message, simply click on the “Update Preview” button at the bottom. The configured message will be visible directly on the page of the site inserted in preview in the panel.
Next to the navigation bar present to enter the URL of the reference site. There is the option to view the message on different devices such as desktop, mobile, and tablet.
Once the configuration is finished, you can save the message by clicking on the “Save” button at the bottom.
Thanks for contributing!