An Audience Persona is a type of Audience that contains users with specific, predefined characteristics. Unlike the Audience Cluster, the Audience Persona aims to identify the ideal user, e.g. the music lover, the businessman, the teenager.
An Audience Persona contains users with attributes that are closely related to the user’s socio-demographic characteristics. These attributes can be combined with each other using logical AND/OR operators.
The Audience Persona has a double value: on the one hand, it allows you to know how many users of your Total Audience belong to an Audience Persona; on the other hand, it allows you to know how many Persona users are present in other types of Audiences.
How to create an Audience Persona
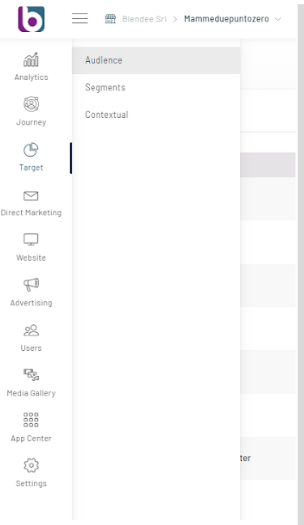
You can create an Audience Persona by clicking on “Target” and then “Audience” from Blendee’s main menu.
Once you have accessed the section, proceed by clicking on the “New Audience” button at the top right.
A screen will open where you can select the type of Audience you want to create.
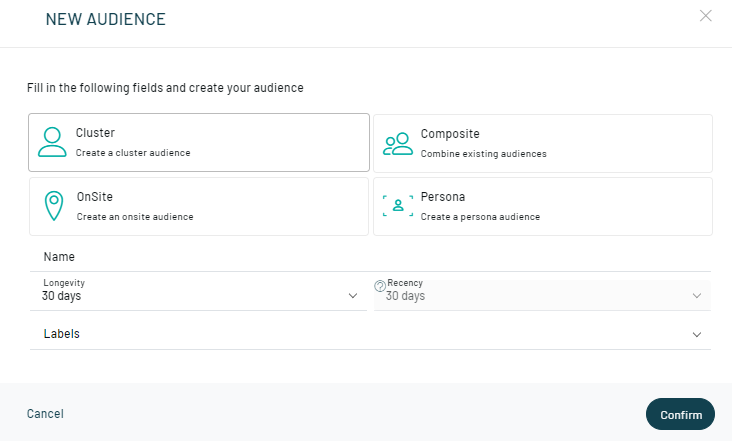
Select Persona and enter the main information to set up the new Audience, such as:
- Name: name you want to give to the Person;
- Longevity: this is the period during which users have been involved with digital properties or advertising campaigns, external to your digital properties. Select the time range you want to associate with the Person (e.g. 30 days, 90 days, 180 days);
- Recency: This is the period during which users have performed an action. Select the recency time range only if you use event attributes (e.g. 30 days, 90 days, 180 days) to build your Audience;
- Labels (optional): If you want to associate a label with the Person.
Once you have filled in all the fields, click on the “Confirm” button.

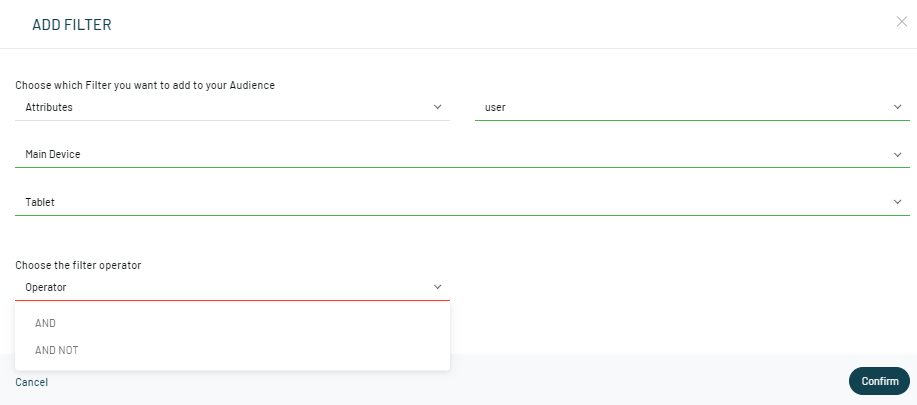
Proceed by adding the filters you want to use to build the Audience. In the “Filter Category” field, select Attributes, and in the “Filter Type” field, select:
- User to identify the socio-demographic characteristics of the user;
- Event to identify characteristics related to the user’s actions.

Now select the User or Event attribute you are interested in in the “Condition” field and the corresponding value in the “Condition Value” field. Finally, in the “Choose the filter operator” field, choose the logical operator AND to include the selected attributes, and the operator AND NOT to exclude. Remember that multiple Condition Values of the same Condition are combined with each other with the logical OR operator.
Your Audience is almost ready to be saved!
Once you get to this step, Blendee shows you the Audience you are creating based on the previously selected fields.
On the left side of the page, you’ll find the chosen Attribute type, Condition, and Condition Value.
On the right side of the page, Blendee shows:
- the estimated number of users who will populate the Audience;
- the funnel chart that shows, starting from the Total Audience, the users for whom Blendee has been able to derive the chosen information;
- the table with the providers of the external platforms available in Blendee and those active on your client with the potential of reachable users.
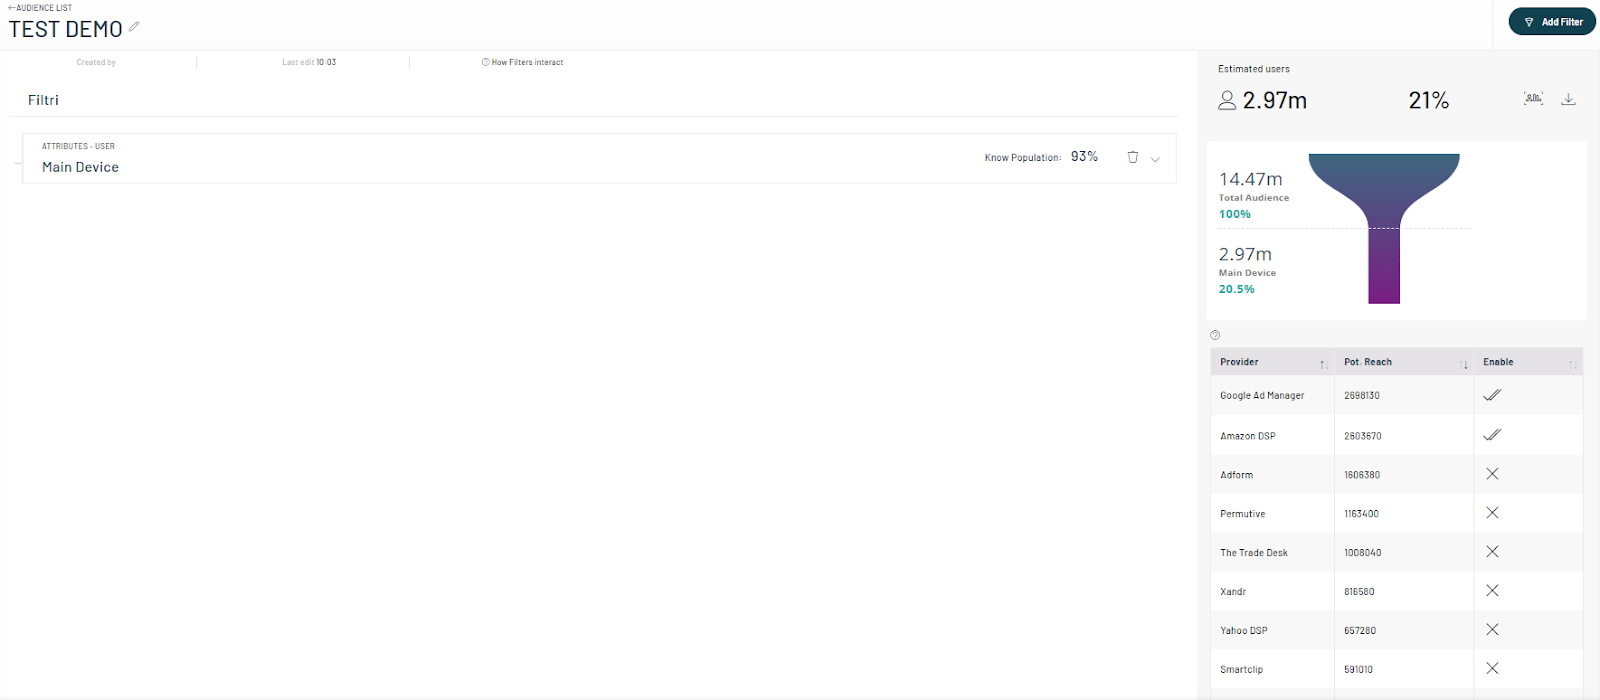
By clicking on the two icons, to the right of the estimated number of users, you can perform the following actions:
- the first allows you to know the profile of your Audience, obtaining valuable information even before creating the Audience such as the device, gender, age, main interest, main sub interest, main context and top URLs;
- the second is to download the information contained in the provider table.

It is possible to add additional levels of attributes to the Audience. To do this, just click on the “Add Filter” button at the top and the screen will open again where you can select the filters you are interested in.
Once you have completed the choice of filters, to save the Audience just click on the “Save and Close” button at the bottom.
Once created, the Audience Persona will be present in the list of your Audiences in the Target>Audience section of Blendee.
Thanks for contributing!