With this article we inaugurate a new series of articles that will allow you to make the most of the new templar editor made available in Blendee.
In this article, we’ll create a basic template from scratch and add elements and customizations in subsequent articles.
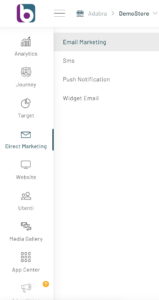
To access the template editor you need to go to Direct Marketing -> Email Marketing.
Once you have entered the section, click on the “New newsletter” button at the top right, from here you can configure all the parameters required for the creation of the newsletter up to the Template choice screen
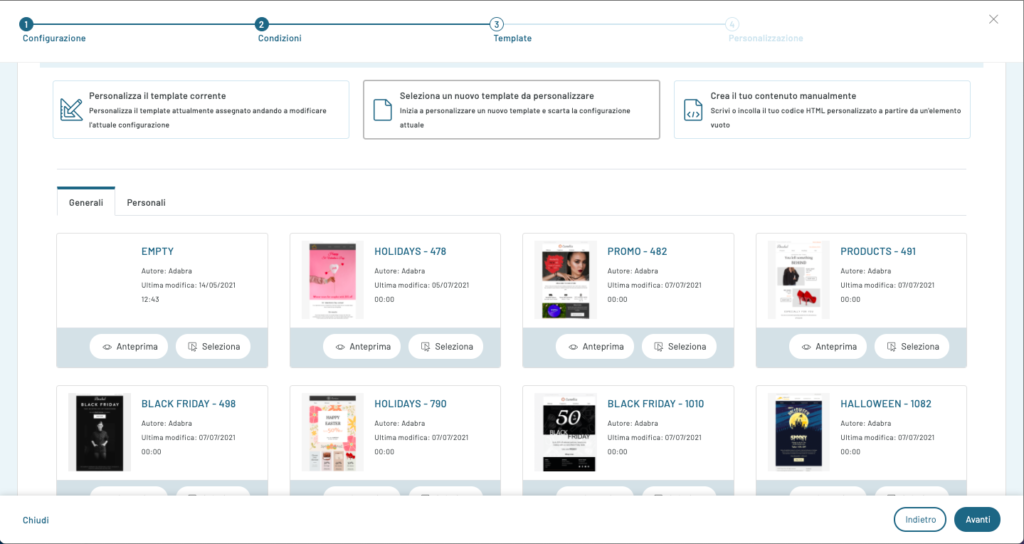
Here click on the first “Empty” template in the General tab and continue on
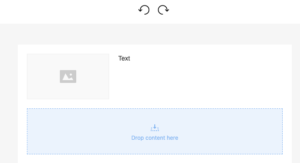
In the next step, the Template Editor will open as in the following figure with a suggested template to edit:

From the left panel, in the “Common” section, you can select and insert, in the central drawing area, the sections, texts and images that will allow you to customize your email.
In our example, we will need to insert a “Header” section, a content section, and a “Footer” section.
Each of these elements can be managed via the icons at the top right of the block. Let’s see them together:

By clicking on this icon we can select the container element higher than the one we have now selected;
![]() By clicking on this icon, you will have the option to save the selected module to be able to use it at any time.
By clicking on this icon, you will have the option to save the selected module to be able to use it at any time.

By clicking on this icon we can duplicate the selected element;

In this case, by clicking on the icon, we will delete the selected block;
In this article we will only worry about building the structure, while in the next ones we will see how to customize the various blocks.
In the left column we insert a block of text (we will use it to insert the link to the web version).

The result will be:
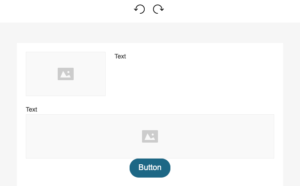
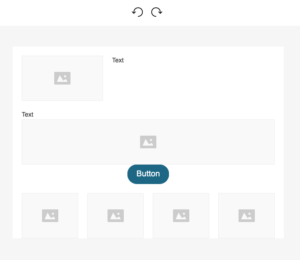
We can proceed to create the body of the email which will have a section with a single column, with greeting text, an image and a call to action.
By dragging it onto the drawing area, let’s insert a Structures using the following icon:

The Section, as mentioned before, already contains the column within it.
At this point, let’s drag, inside the column: the Text block, an image block and then a button block with the following icon:

The result after the entries will look like this:
In our example, all that remains is to insert a footer. The footer that we are going to create will have four columns where: in the first we will enter the data relating to our company and in the other three the social icon with the link to our accounts.
Let’s proceed by dragging the usual Structure block with 4 columns.

After inserting the four columns, in the first on the left we insert a block of text, in the other three columns we insert three blocks of text.
The result, once all the blocks have been inserted, will be as follows:
Next, we can place the menu and customize each menu item including, link, color, background color.

These are the most used blocks for creating an email with our editor, once you have finished customizing click on Save
Thanks for contributing!