The Scheduled Activity Trigger allows you to send a communication (email, sms, push notification…) at a specific time thanks to the schedule.
It allows you to schedule communications according to specific needs, i.e. choose the day, month, year and time in which to send our trigger.
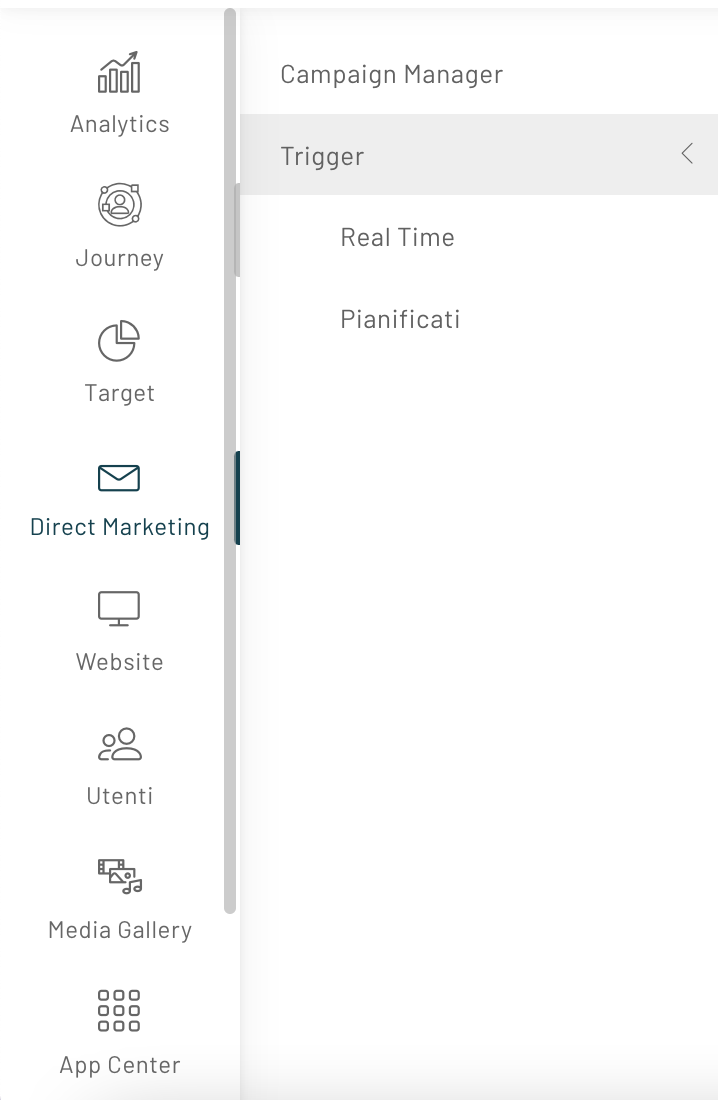
To configure this trigger, click on Journey -> Triggers -> Scheduled and on the “New Trigger” button at the top.
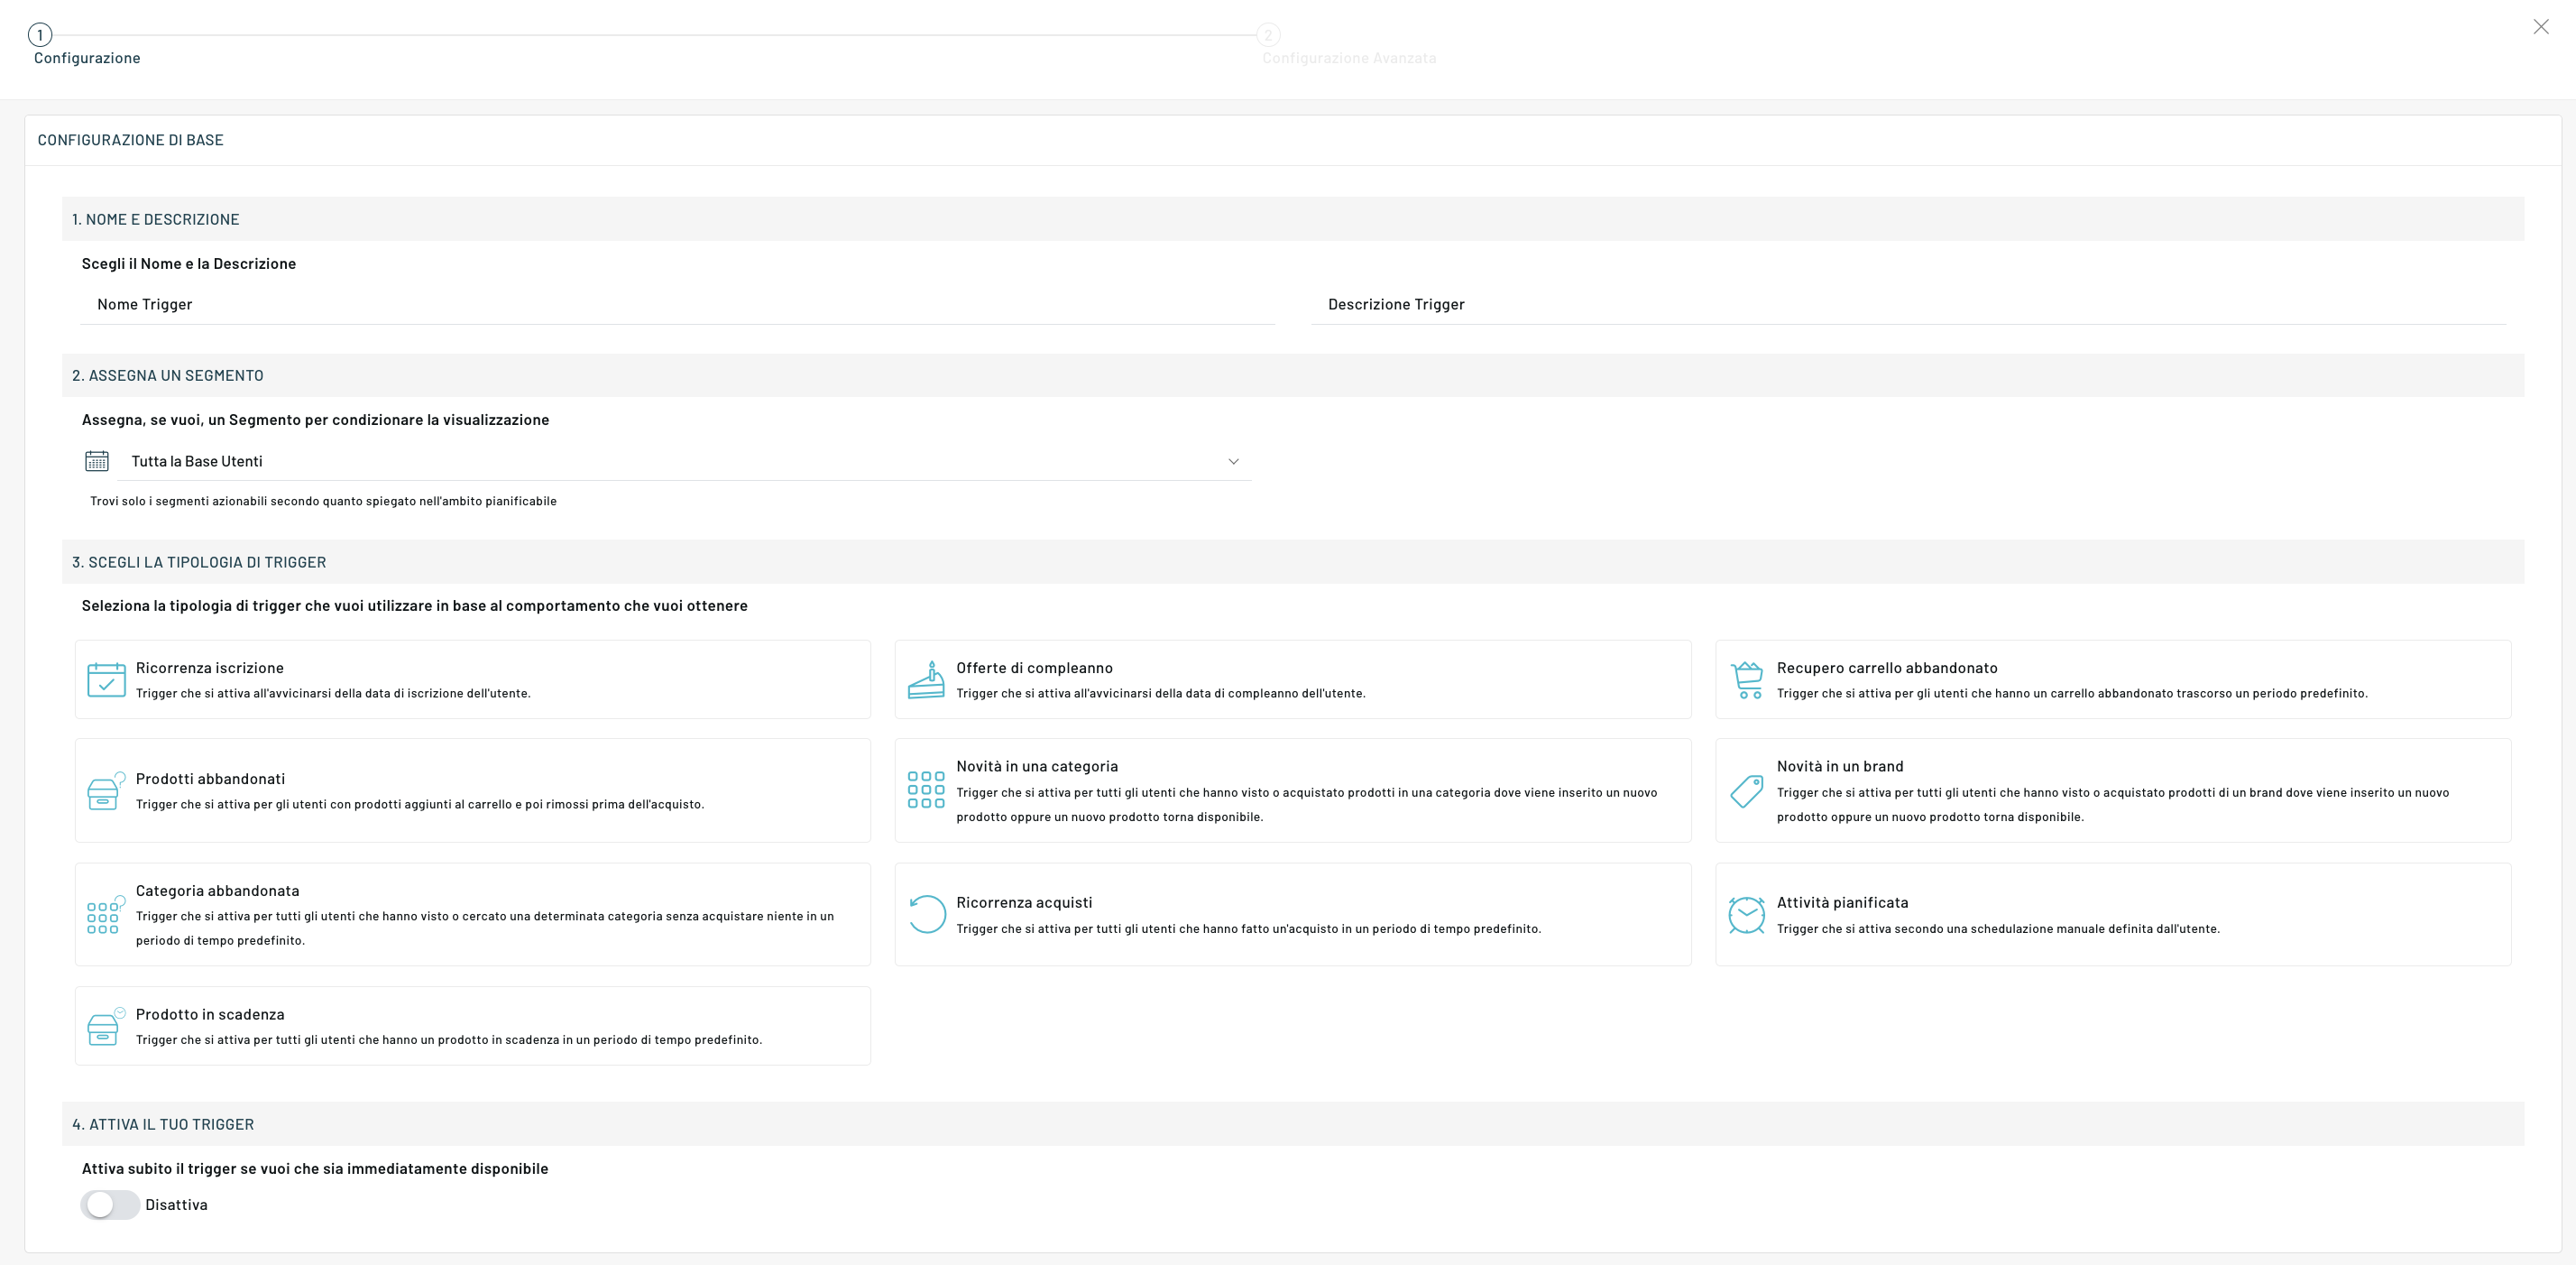
Let’s enter the name and a description for the trigger.
We can select users who do or do not belong to a segment.
We have different types of scheduled triggers that you can select.
Each type of trigger has different advanced configurations.
Types of Scheduled Triggers
1) Enrolment recurrence
A trigger that fires as the user’s enrollment date approaches.
2) Birthday Offers
A trigger that fires as the user’s birthday approaches.
3) Abandoned Cart Recovery
Trigger that fires for users who have an abandoned cart after a predefined period.
4) Abandoned products
Trigger that activates for users with products added to their cart and then removed before purchasing.
5) What’s new in a category
A trigger that fires for all users who have seen or purchased products in a category where a new product is added or a new product is back in stock.
6) What’s new in a brand
Trigger that is activated for all users who have seen or purchased products from a brand where a new product is inserted or a new product becomes available again.
7) Abandoned Category
Trigger that fires for all users who have viewed or searched for a certain category without purchasing anything in a predefined time period.
8) Purchase recurrence
Trigger that fires for all users who have made a purchase in a predefined time period.
9) Planned Task
Trigger that activates according to a user-defined manual schedule.
10) Expiring product
Trigger that fires for all users who have a product expiring in a predefined time period.
Let’s take an example of use for a generic scheduled task
In step 3 of the configuration, select the “Scheduled task” trigger.

After selecting the trigger, click on “Next”.
At this point you will be able to set the Advanced Configurations.
For point 5 “Limits and error handling” we recommend that you read the article “Conditioning trigger submissions”.
Once the trigger has been created and saved, you must proceed with the configuration of the message or action for the specific trigger you created.
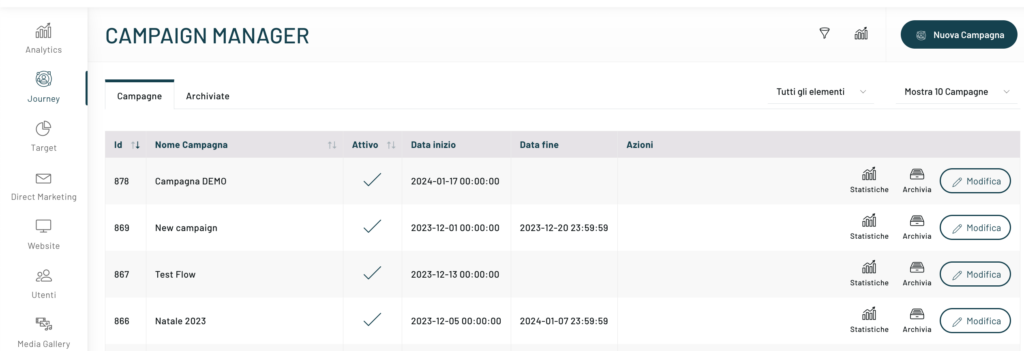
This takes you to the side menu, click on the “Campaign Manager” item, and then select the campaign on which you are going to insert the trigger by clicking on “Edit.”
You can, at this stage, also choose to create a new campaign by clicking on “New Campaign.”
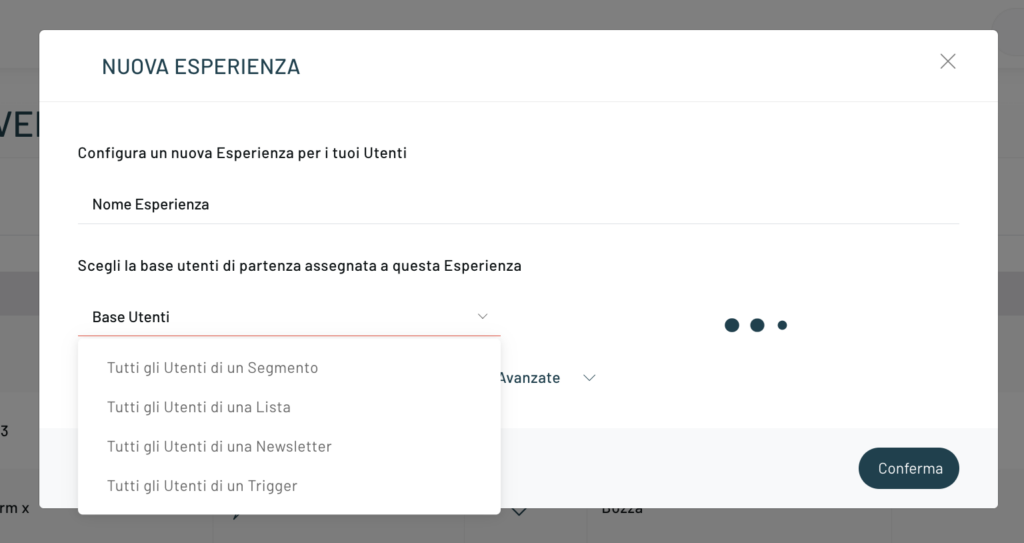
To proceed, once you have chosen to create or edit a campaign, click on the “Create New Experience” button at the top right.
After entering the name of the experience, select “All users of a trigger” from the drop-down menu in the User Base, choose the one you are interested in from those created and click on the Confirm button.
At this point, the experience customization page will open and here it will be possible to select the type of triggers we would like to use, and then we could finish the configuration.
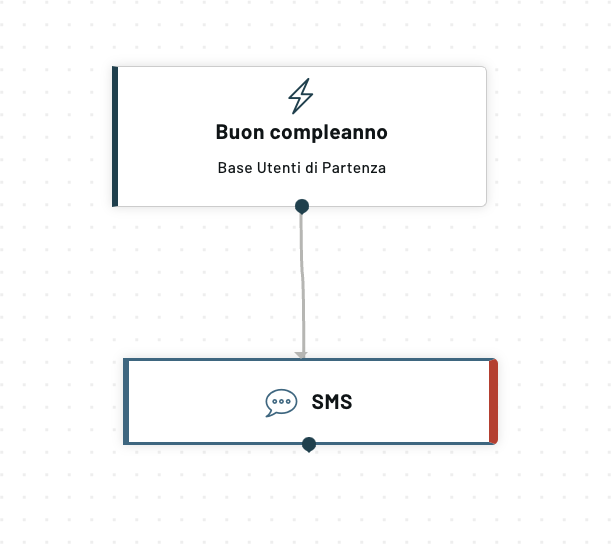
Let’s take an example: I want to set up the sending of an SMS for a previously created trigger, on the occasion of the anniversary of the birthday.
To proceed, drag the SMS element from the left column and link it to the starting user base. At this point, click on the element and a right column will open where you can complete the Configuration.
Thanks for contributing!